Automated Stories
Overview
Teaching: 10 min
Exercises: 5 minQuestions
How can I share my large tissue images with collaborators or the public?
Objectives
Create a new Minerva Story from an OME-TIFF image.
Save and Load a story to a file.
Publish a story to create web-ready files for sharing.
Automated Stories are for quick or large-scale data sharing
- All decisions about image presentation are made automatically by the Minerva Author software.
- Automated stories don’t require any manual work or decisions by the author.
- While the output might not be perfect, it’s at least very quick to produce.
Launch Minerva Author
Open your Downloads folder and navigate to the minerva_author_VERSION folder we unzipped during
Setup. Open this folder and locate the file named minerva_author or minerva_author.exe.
Windows users
You may need to navigate one folder level deeper to find the minerva_author.exe file. Once you
find it, double-click the file to launch the program. If you see a security popup, click “More info”
and then “Run Anyway”.
MacOS users
Hold the Control key and click the minerva_author file. Then click “Open” in the menu
that appears. If you see a security popup, click “Open”.
Waiting for the application to launch
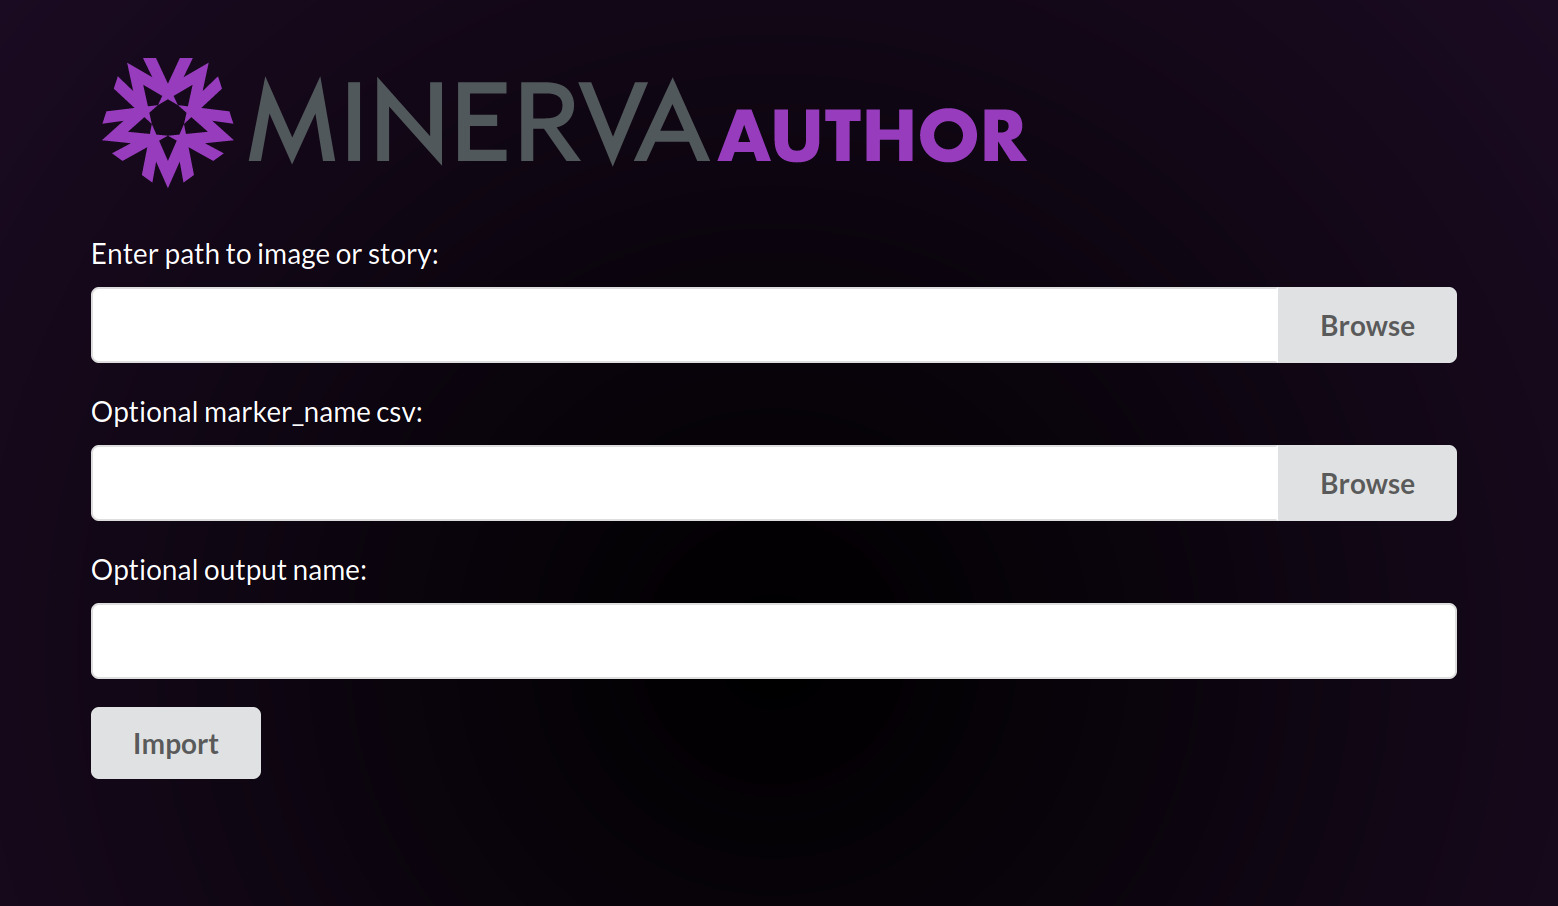
A black console window will now open. This is the actual Minerva Author application, but we will interact with it through a web browser. The application will take about one minute to fully launch, at which point your web browser should automatically open a new tab displaying the Minerva Author interface. This is what the new browser tab will look like:
This part will take a while
Acknowledge that this is frustrating but assure the learners that the software team is working to eliminate this delay.
What to do if the new browser tab does not appear
If an error about web browsers appears in the console window, or the console window displays the text “Running server with N threads” but the browser tab does not open, manually navigate to http://127.0.0.1:2020/ in your browser.
- When you want to quit Minerva Author, you will close the console window.
- If you accidentally close the console window, close your Minerva Author web browser tab and re-launch the Minerva Author application by following the instructions above.
Story creation begins with selecting an OME-TIFF image
Under “Enter path to image or story”, click Browse.
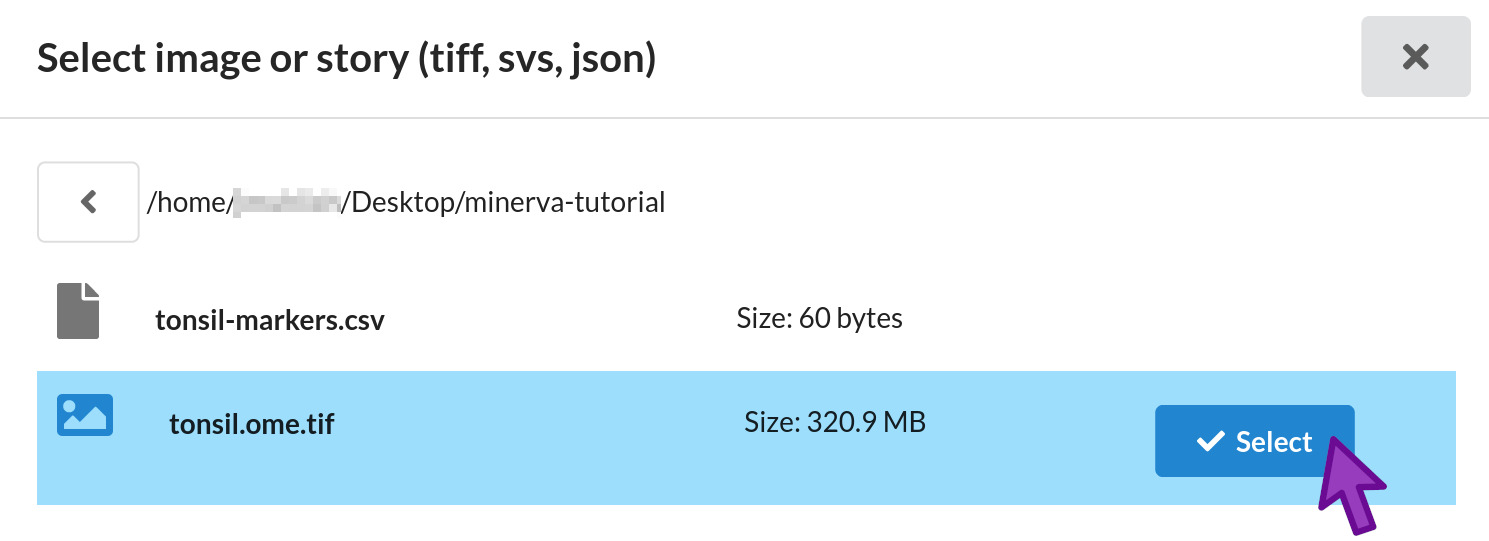
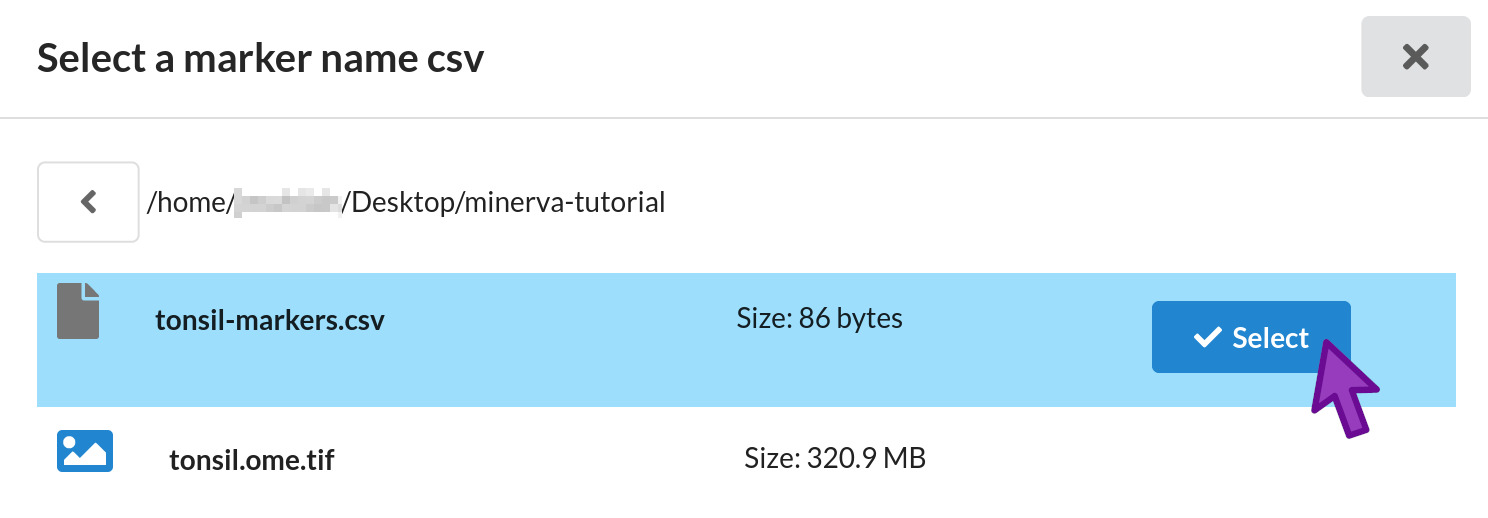
The file browser allows you to navigate your folders and files in order to choose an OME-TIFF image file with which to create your story. We will be selecting the example tonsil image we downloaded earlier.
- Navigate in the file browser to your Desktop folder, then the minerva-tutorial folder we created during Setup.
- Click the Select button next to the
tonsil.ome.tiffile. - If you navigate into the wrong folder by mistake, click the left arrow button at the top left to go back up one folder level.
- The file browser will only allow you to select OME-TIFF files (and previously saved story files, which we will cover later).
- You can close the file browser to cancel choosing a file with the X button in the upper right.
- If you click Select on the wrong file, you can click the Browse button to reopen the file browser and choose another file.
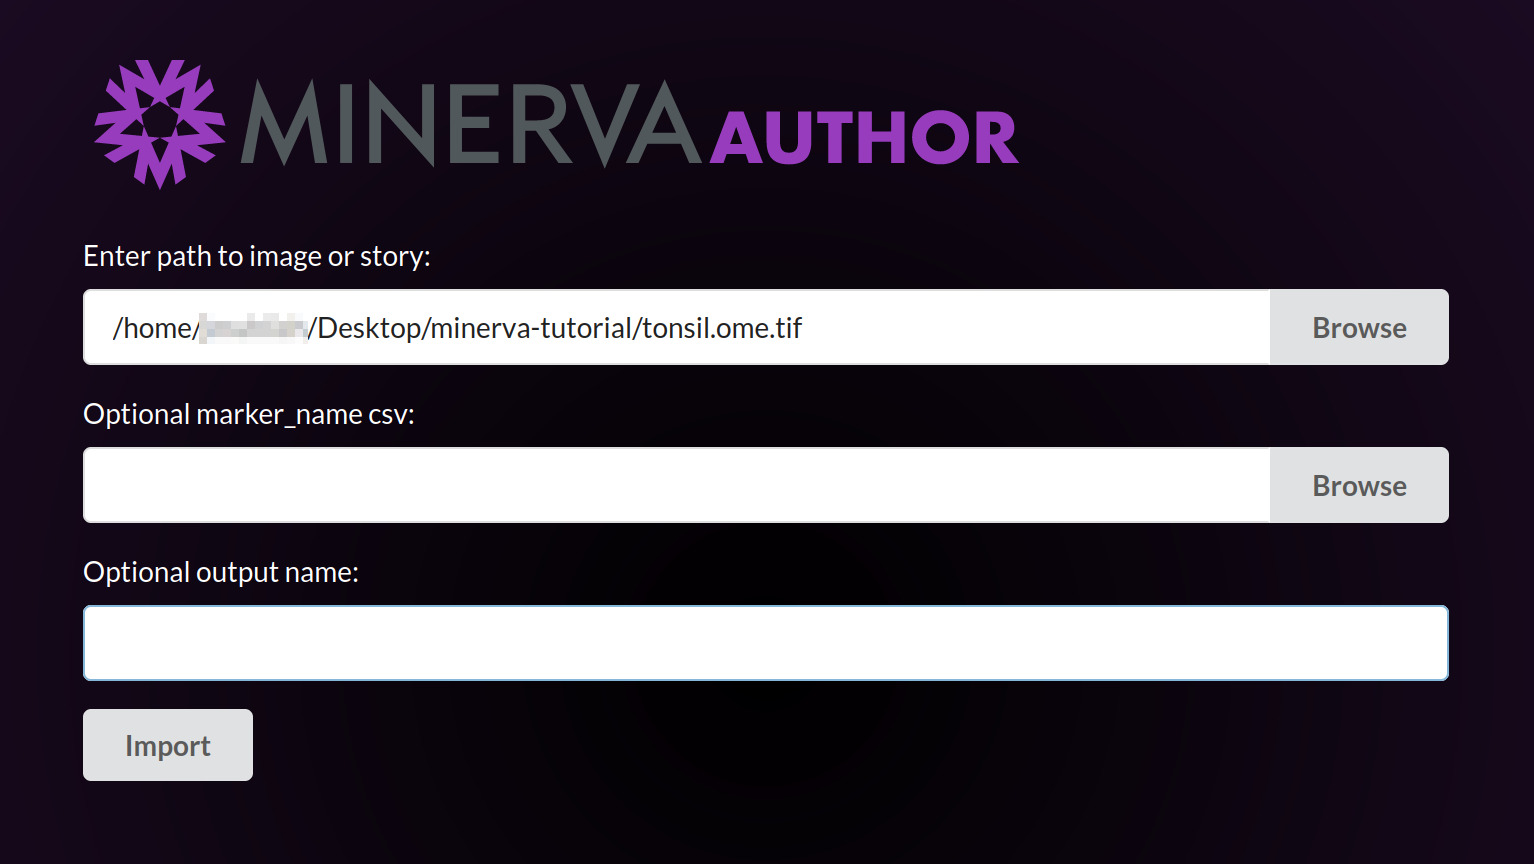
The file browser will close and you will see the full path to tonsil.ome.tif in the first form
field.
Under “Optional marker_name csv”, click Browse. The minerva-tutorial folder should still be
selected. Click the Select button next to the tonsil-markers.csv file.
- For your own images, you will select the matching “markers.csv” file used for mcmicro.
- If your OME-TIFF contains embedded channel names, you may skip selecting a marker csv file.
The file browser will close and you will see the full path to tonsil-markers.csv in the second
form field.

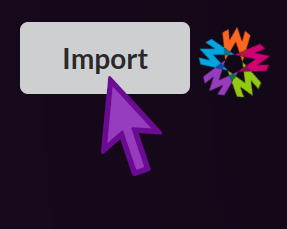
Finally, click the Import button. A spinning progress indicator will appear for a few seconds while Minerva Author loads the image.
- The time to load the image depends on how many channels the image has and how fast your computer is.
- The example tonsil image has ten channels and should load in just a few seconds.
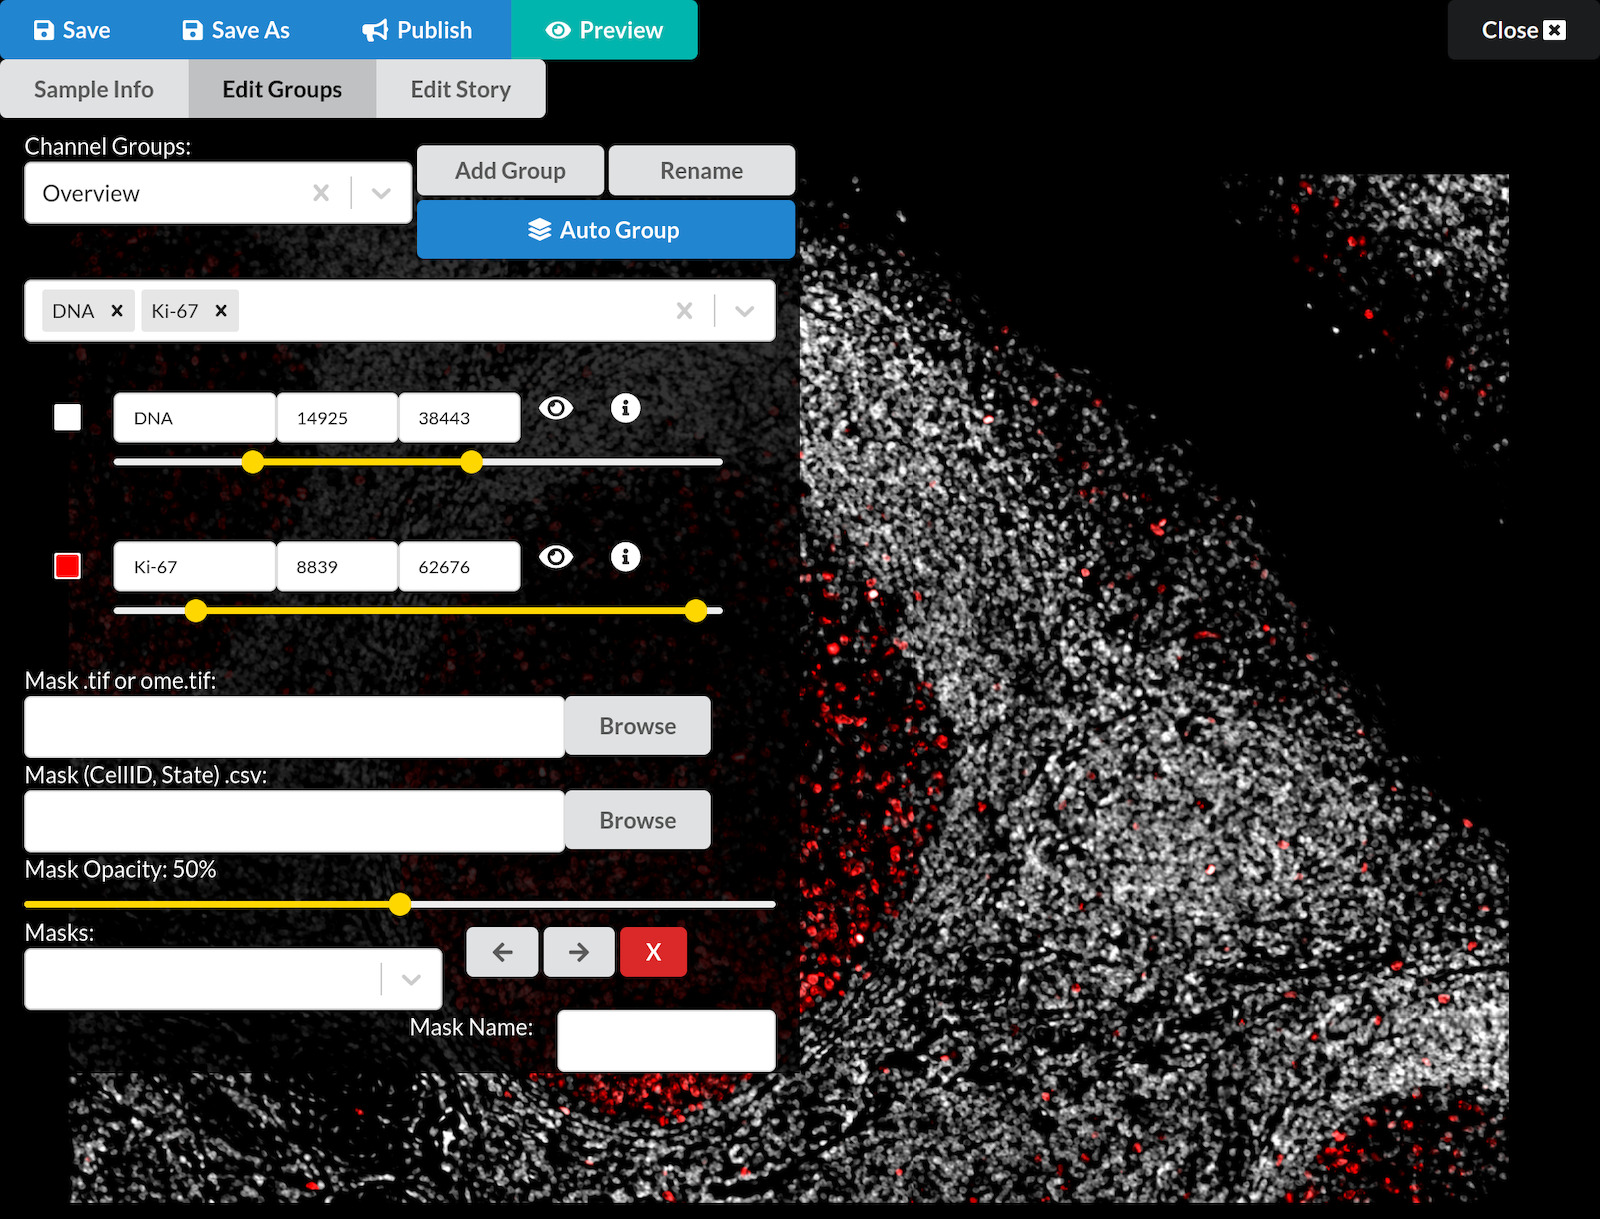
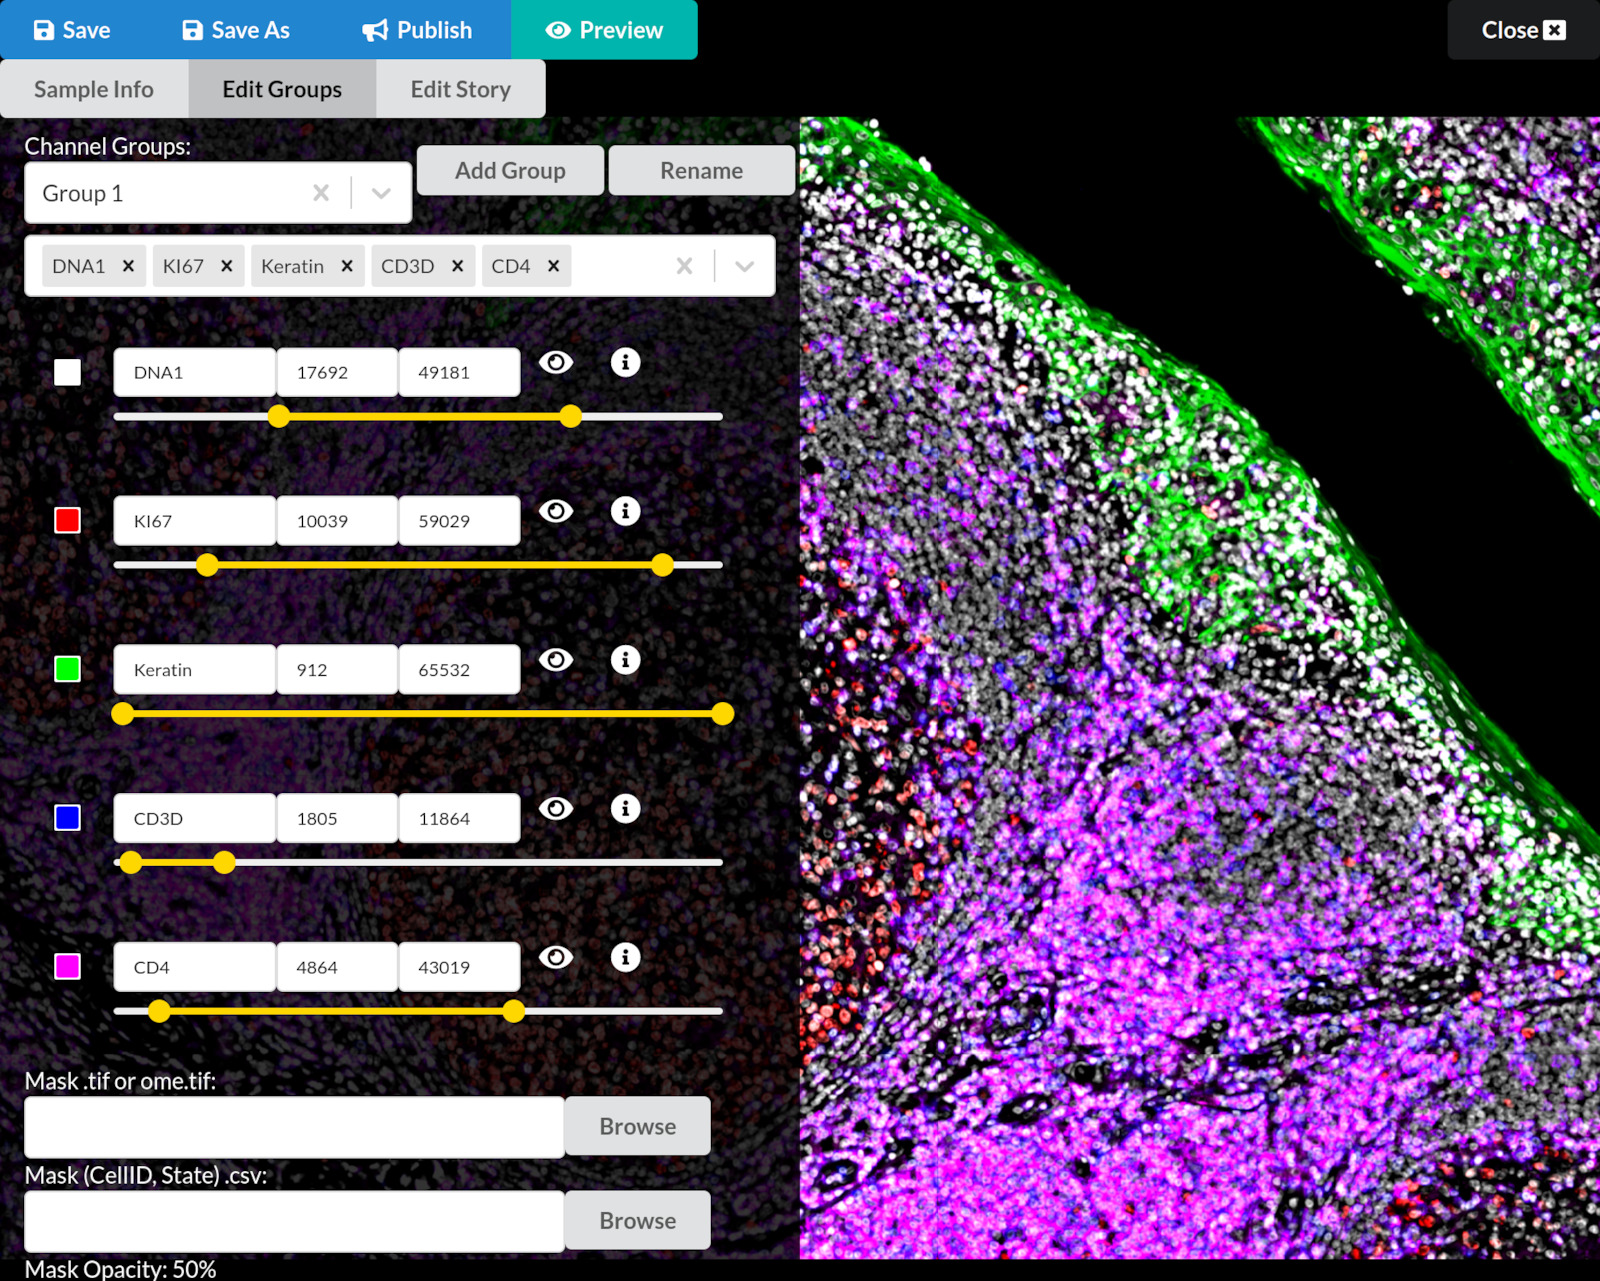
First look at the story editing interface
When the image loading is complete, the view will change to show the story editing interface.
- A dialog window will appear, displaying a summary of your input file and output location settings. Click the OK button to dismiss it.
- In the editing interface you can now see, the upper left area contains buttons and other interactive elements for editing your story. We will explain each one gradually over the course of this tutorial.
- The first two channels of the image are shown in white and red in the background.
- You can freely explore the image. To pan around, click and drag on the image. To zoom in and out, put your cursor over the image and pinch or two-finger scroll on a trackpad or scroll with a mouse wheel.
Navigating the image
Pan and zoom the image so the germinal center (the large round structure filled with red Ki-67-positive cells) is centered and fills up most of your screen.
Channel groups define meaningful sets of image channels
It is difficult to accurately display more than a few image channels at one time using different colors. Turning individual channels on and off manually would be a lot of work for viewers of a story, and furthermore viewers may not even know which channels make sense to display together in the context of your images. To help solve this problem, Minerva lets the story author group related channels together and assign them distinct colors. Later we will see how these channel groups can used to enhance the narrative flow of your story, but initially we will focus just on creating and viewing these groups.
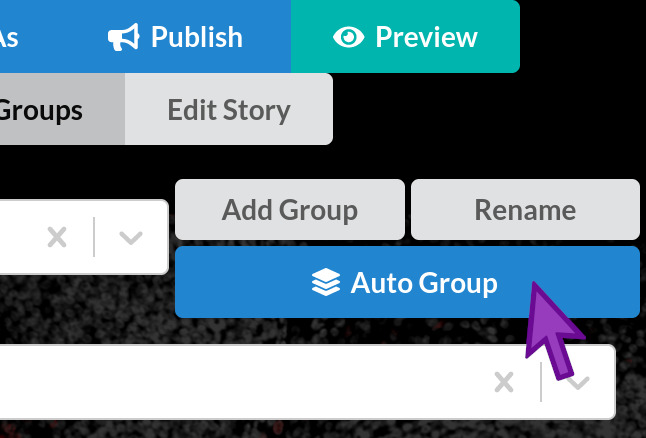
The Auto Group button groups all channels using simple rules
While Minerva Author has many options for manually configuring channel groups and other channel settings, our goal for now is to create an Automated story that doesn’t need much effort or decisionmaking. Therefore we will use the Auto Group feature, which groups and colorizes all channels in your image using a few simple rules.
Click the “Auto Group” button now. A dialog will appear with a summary of the groups to be created, and a reminder that any existing channel groups in your story will be deleted. Click OK to continue. In the future, you can use the Cancel button if you ever click Auto Group by accident.
Auto Group results (open response)
What do you notice has changed on the screen after running Auto Group?
Solution
- The image is now more colorful, showing more channels at once
- The channel groups list in the upper left now shows more channel names
- The channel settings area in the middle left now shows more channels
- The channel group selector now shows the name “Group 1” instead of “Overview” (minor point)
Channel grouping rules
- If your image has channels whose names start with “DNA” or “Hoechst” spaced regularly across the channel list, Minerva Author will assume your image comes from a cyclic imaging method such as CyCIF and create groups based on your imaging cycles. The DNA or Hoechst channels will be used as a reference to locate the cycle boundaries.
- If your channel names do not fit this pattern, channels will be grouped in sets of 3, 4 or 5 – whichever group size best fits your total number of channels.
Channel color assignment rules
Regardless of which grouping rule was used, colors will be assigned to the channels in each group using a fixed color list: 1-white, 2-red, 3-green, 4-blue, and 5-magenta. Groups with fewer than five channels will use only the lower-numbered colors in the list.
Group naming rules
The automatically created groups will be named “Group 1”, “Group 2”, and so on.
Previewing your story
Up until now, we have been looking at the story authoring interface. Once your story is published on the web, the viewing interface looks somewhat different. To see exactly what your published story will look like, click the Preview button. This will open your story in preview mode in a new tab. Explore the story in preview mode and close that browser tab when you are done.

Critique the Automated story (Pair discussion)
Before closing the preview mode tab, turn to your neighbor and discuss together what you do and don’t like about the Automated story we just created. Take a moment to notice what is drawing your eye. Do these things help you understand the data or are they making it difficult? What might you want to change?
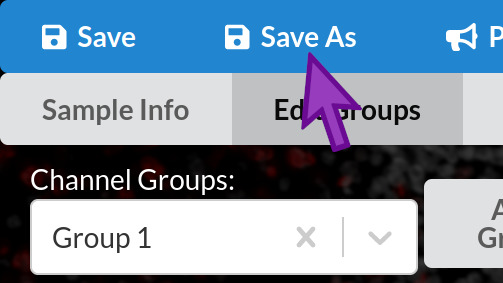
Save your story
Now that we are done with all the steps for creating an Automated story, we will save it to a file.
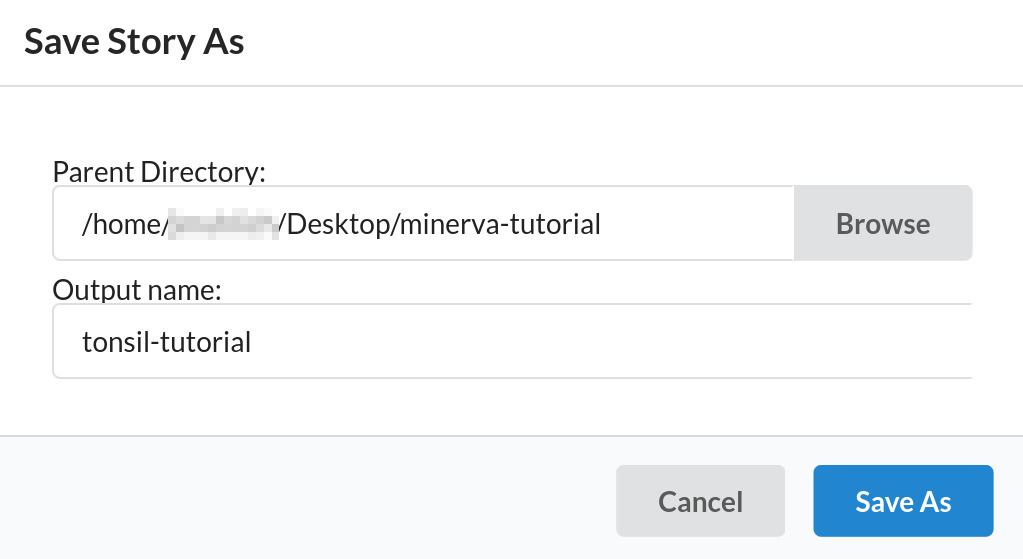
Click the “Save As” button. A dialog will appear, prompting you for a folder (directory) and file name for saving. Click the Browse button and navigate to your Desktop folder, then click the Select button next to the minerva-tutorial folder. If you accidentally navigate into the minerva-tutorial folder instead of clicking Select, click the left arrow button in the top left to go back up one level.
Click in the “output name” field, delete the existing text and type tonsil-tutorial. This name
will be used along with the extension .story.json to create your story save file. In this case the
full file name will be tonsil-tutorial.story.json. Now, click the “Save As” button on the dialog
to save the file and close the dialog.
Story save files only point to original image data
story.json files are extremely tiny, usually just a few kilobytes. They do not store a copy of your image data, but rather a pointer to where the original image file lives. If that original image file is moved or you open the story file on a different computer, Minerva Author will prompt you to find the new location of the image file.
Close and reload your story
To demonstrate that your story was successfully saved, and also how to open an existing story, we will close this story and open it back up from the save file.
First, click on the “Close” button in the upper right corner of the screen. If you see a dialog pop up warning you about unsaved changes, you can click “OK” since we know we just saved our story. If you see this later on your own, consider whether you have made any important changes since saving and click “OK” or “Cancel” accordingly.
Now, click the first Browse button and navigate to your Desktop minerva-tutorial folder. You will
notice that there are now two files with a Select button indicating they are available to open:
tonsil.ome.tif which we opened to initially create our story, and also
tonsil-tutorial.story.json which is the story file we just saved. Click Select next to the
story.json file, then click the Import button. Everything should appear as it did when we clicked
“Save As” earlier.
Auto-saving
Even before you clicked “Save As”, Minerva Story was continually auto-saving your work so you can recover if the program crashes. The auto-save files can be found in the folder next to the minerva_author program file. The auto-saves are regular story.json files that can be opened like any other story file.
Minerva Author also auto-saves after you click “Save As”. If the program crashes during editing, then upon reopening your story file you will be prompted whether to recover your story using the auto-save data.
Publishing your story
The last step is to create the file package that will be uploaded to your web hosting service for
viewing by your audience. Click the Publish button, and a dialog will appear prompting you for a
folder location and sub-folder name. We will use the default values, which will place the published
file package next to your story.json file using a sub-folder with the same base name. In this case
the sub-folder will be named tonsil-tutorial. Now click the Publish button in the dialog, which
will close the dialog and begin the publishing process. While the process is running the Publish
button will display a spinning animation, and a progress bar with percent completion will appear
below it. Once the progress bar reaches 100%, the file package is complete.
Getting your file package on the web
The process of actually putting the published file package on the web is beyond the scope of this tutorial. Consult the IT staff at your institution for guidance.
Episode wrap-up
Automated stories will adapt your image data for visual presentation using statistical models and best-effort heuristics. Usually they work well but sometimes they do fail to produce the results you were expecting. We will discuss how to address these failures in the next episode.
Key Points
Automated Stories are for quick or large-scale data sharing
Minerva Author runs in a terminal window but you interact with it through a web browser
Story creation begins with selecting an OME-TIFF image
Channel groups define meaningful sets of image channels
The Auto Group button groups all channels using simple rules
Stories are saved and loaded as small .story.json files
Publishing a story created a package of files that must be uploaded to a website hosting service